ESP-12 ESP8266 with SSD1306 OLED Display - Arduino Code
This guide provides an Arduino sketch to interface an ESP-12 (ESP8266) with a 0.96" SSD1306 OLED display using the Adafruit SSD1306 library. The code initializes the OLED screen, displays text, and draws simple graphics.

ESP-12 ESP8266 with SSD1306 OLED Display
Arduino sketch for the ESP-12 (ESP8266) with an OLED display using the Adafruit_SSD1306 library.
ESP-12 (ESP8266) with OLED Display (SSD1306) - Arduino Code
This guide provides an Arduino sketch to interface an ESP-12 (ESP8266) with a 0.96" SSD1306 OLED display using the Adafruit SSD1306 library. The code initializes the OLED screen, displays text, and draws simple graphics.
** Hardware Requirements **
- ESP-12 (ESP8266) Module
- 0.96" OLED Display (SSD1306, I2C)
- Jumper Wires
- 3.3V Power Source (ESP-12 operates at 3.3V)
** Wiring Diagram (ESP-12 to OLED - I2C Mode)**
| OLED Pin | ESP-12 Pin |
|---|---|
| VCC | 3.3V |
| GND | GND |
| SDA | GPIO4 (D2) |
| SCL | GPIO5 (D1) |
** Install Required Libraries **
Before uploading the code, install the following libraries in the Arduino IDE:
- Adafruit GFX
- Adafruit SSD1306
- Wire (Pre-installed in Arduino IDE) To install:
- Go to Sketch → Include Library → Manage Libraries
- Search and install Adafruit GFX & Adafruit SSD1306
    #include <Wire.h>
#include <Adafruit_GFX.h>
#include <Adafruit_SSD1306.h>

#define SCREEN_WIDTH 128
#define SCREEN_HEIGHT 64

Adafruit_SSD1306 display(SCREEN_WIDTH, SCREEN_HEIGHT, &Wire, -1);


void setup() {
  Serial.begin(115200);


  if(!display.begin(SSD1306_SWITCHCAPVCC, 0x3C, false, false)) {
    Serial.println(F("SSD1306 allocation failed"));
    for(;;);
  }
  delay(2000); // Pause for 2 seconds

  // Clear the buffer.
  display.clearDisplay();

  display.setTextSize(1);
  display.setTextColor(SSD1306_WHITE);
  display.setCursor(0,0);
  display.println("ESP12 SSD1306 OLED");
  display.setTextSize(2);
  display.setCursor(0,24);
  display.println("EltroNerd");
  display.setTextSize(1);
  display.setCursor(0,44);
  display.println("[email protected]");
  display.display();
}

void loop() {
  display.clearDisplay();

    // Display Title
    display.setCursor(10, 10);
    display.setTextSize(2);
    display.print("ESP-12 OLED");

    // Draw a Rectangle
    display.drawRect(20, 30, 80, 20, WHITE);

    // Draw a Circle
    display.fillCircle(64, 50, 5, WHITE);

    display.display();
    delay(1000);
}

“LVGL is the only framework that I've seen as open source Graphics Library for Microcontrollers. It’s easy to customize, adapts to any design, and the build size is tiny.”
Recent Posts
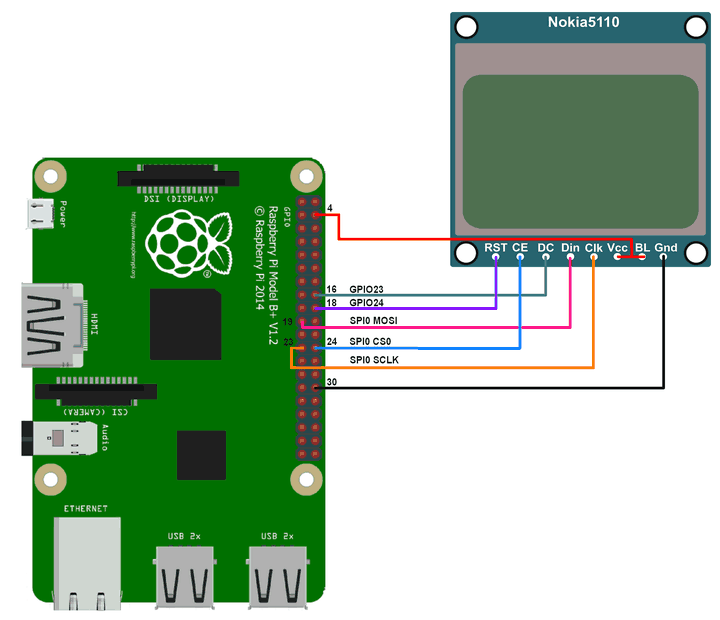
Nokia 5110 LCD with a Raspberry Pi using WiringPi
Nokia 5110 LCD PCD8544 driver with a Raspberry Pi using WiringPi
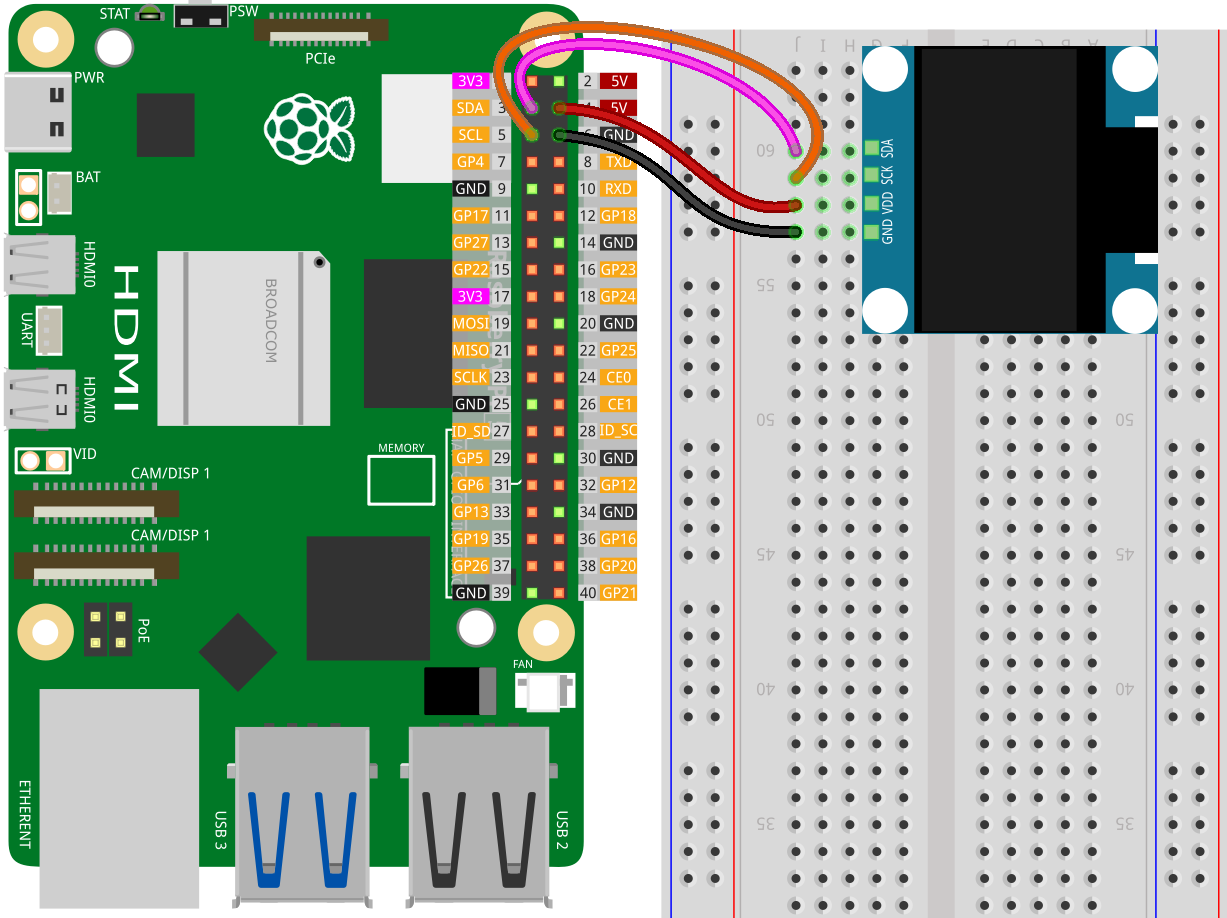
OLED ssd1306 interface with Raspberry Pi using WiringPi
OLED ssd1306 display interface with Raspberry Pi using WiringPi

ESP32 lvgl touch display control multiple relay
To control a 4-channel relay using an ESP32 with a touch display (via LVGL library), you can integrate the relay control with a graphical user interface (GUI).
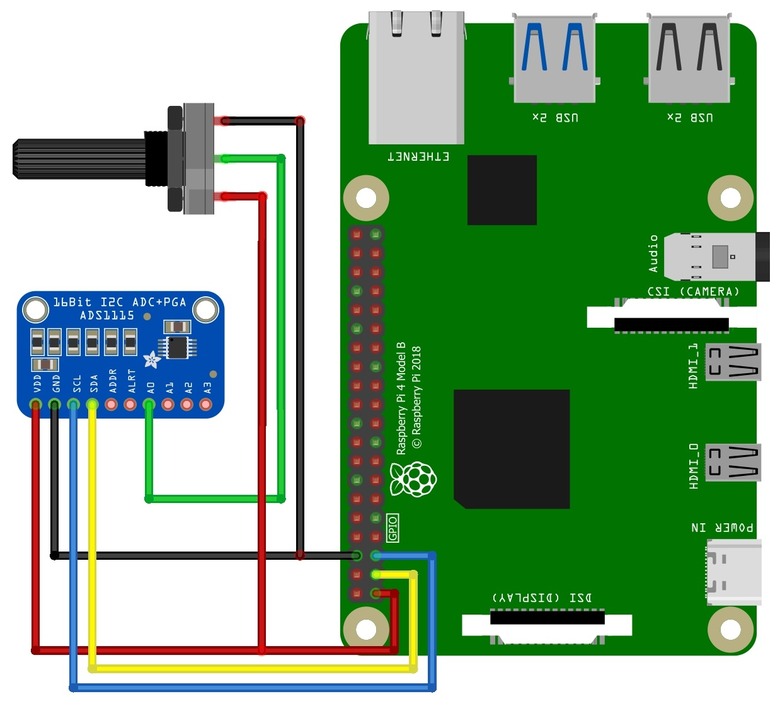
Interface the ADS1115 adc with a Raspberry Pi using WiringPi
Interface the ADS1115 analog-to-digital converter (ADC) with a Raspberry Pi using WiringPi
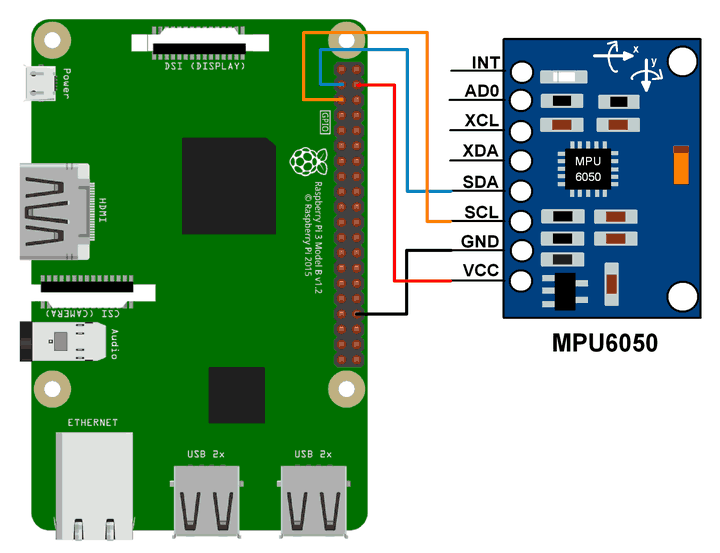
MPU6050 sensor interface with Raspberry Pi using WiringPi
MPU6050 Accelerometer and Gyroscope interface with Raspberry Pi using WiringPi
ESP32 Wifi http get and post method request
To perform HTTP GET and HTTP POST requests on an ESP32, you can use the WiFi and HTTPClient libraries.