Face Recognition Door Lock using ESP32-CAM
Face Recognition Door Lock using ESP32-CAM. This project integrates face detection, a servo-controlled lock, and optional Wi-Fi monitoring.
Face Recognition Door Lock using ESP32-CAM
Upgrade your smart lock system with face recognition for secure, contactless access.
This project uses ESP32-CAM to detect and recognize faces and controls a servo motor to unlock doors for authorized users.
🛠️ Hardware Requirements
- ESP32-CAM Module (with OV2640 camera)
- Servo Motor or Electromagnetic Lock
- FTDI Programmer (for programming ESP32-CAM)
- Jumper wires and breadboard
- 5V power supply for servo
- Optional: OLED display for lock status feedback
⚡ Working Principle
Face Detection & Recognition:
- ESP32-CAM captures frames and detects faces using ESP32 face recognition libraries (like ESP-WHO).
- Recognized faces are matched against a stored database of authorized users.
Lock Control:
- If a face is recognized, ESP32 triggers the servo motor to unlock the door.
- If unauthorized, the door remains locked and optionally triggers an alert.
Optional Wi-Fi Monitoring:
- Lock/unlock events and unauthorized access attempts can be sent to a cloud dashboard or app.
💻 Arduino/ESP-IDF Code Example (ESP-WHO)
Note: Face recognition requires ESP-WHO library in ESP-IDF environment.
Below is a simplified logic outline:
    #include "esp_camera.h"
#include "soc/soc.h"
#include "soc/rtc_cntl_reg.h"
#include <Servo.h>

#define SERVO_PIN 23
Servo lockServo;

// Camera pins configuration for ESP32-CAM
camera_config_t config = {
    .pin_pwdn = -1,
    .pin_reset = -1,
    .pin_xclk = 0,
    .pin_sccb_sda = 26,
    .pin_sccb_scl = 27,
    .pin_d7 = 35,
    .pin_d6 = 34,
    .pin_d5 = 39,
    .pin_d4 = 36,
    .pin_d3 = 21,
    .pin_d2 = 19,
    .pin_d1 = 18,
    .pin_d0 = 5,
    .pin_vsync = 25,
    .pin_href = 23,
    .pin_pclk = 22,
    .xclk_freq_hz = 20000000,
    .pixel_format = PIXFORMAT_JPEG,
    .frame_size = FRAMESIZE_QVGA,
    .jpeg_quality = 10,
    .fb_count = 1
};

void setup() {
  Serial.begin(115200);
  lockServo.attach(SERVO_PIN);
  lockServo.write(0); // Lock closed

  // Initialize camera
  esp_err_t err = esp_camera_init(&config);
  if (err != ESP_OK) {
    Serial.printf("Camera init failed: %d\n", err);
    return;
  }

  Serial.println("Face recognition door lock ready!");
}

void loop() {
  // Capture frame
  camera_fb_t *fb = esp_camera_fb_get();
  if(!fb){
    Serial.println("Camera capture failed");
    return;
  }

  // TODO: Use ESP-WHO API to detect face
  bool faceDetected = true; // Replace with actual detection
  bool authorizedFace = true; // Replace with recognition logic

  if(faceDetected){
    if(authorizedFace){
      Serial.println("Authorized face detected! Unlocking...");
      lockServo.write(90); // Unlock
      delay(5000);
      lockServo.write(0); // Lock again
    } else {
      Serial.println("Unauthorized face detected!");
      // Optional: Wi-Fi alert
    }
  }

  esp_camera_fb_return(fb);
  delay(2000);
}
ESP32-CAM Face Recognition: Understanding faceDetected and authorizedFace
In ESP32-CAM face recognition projects, you often see placeholder code like this:
// TODO: Use ESP-WHO API to detect face
bool faceDetected = true; // Replace with actual detection
bool authorizedFace = true; // Replace with recognition logic
Detect a Face
Use ESP-WHO’s face detection API:
face_id_list_t face_list;
mtmn_config_t mtmn_config = mtmn_init_config();
mtmn_config.type = FAST;

// Convert camera frame to RGB format
dl_matrix3du_t *image_matrix = dl_matrix3du_alloc(1, fb->width, fb->height, 3);
fmt2rgb888(fb->buf, fb->len, fb->format, image_matrix->item, fb->width, fb->height);

// Perform detection
face_list = face_detect(image_matrix, &mtmn_config);

if(face_list.length > 0){
    faceDetected = true;
} else {
    faceDetected = false;
}

dl_matrix3du_free(image_matrix);
Recognize the Face
ESP-WHO generates face embeddings, which are numeric representations of faces. Compare the detected face embedding with stored embeddings:
if(faceDetected){
    float similarity = face_recognize(face_embedding, authorized_embedding);
    if(similarity > 0.7){ // Threshold for recognition
        authorizedFace = true;
    } else {
        authorizedFace = false;
    }
}
Connect servo motor to ESP32-CAM pin (e.g., GPIO23).
Use programmer to upload code to ESP32-CAM.
Train ESP32-CAM with authorized face images using ESP-WHO.
Place ESP32-CAM at the door entrance.
When a face is recognized, the servo unlocks for a few seconds, then locks again.

“LVGL is the only framework that I've seen as open source Graphics Library for Microcontrollers. It’s easy to customize, adapts to any design, and the build size is tiny.”
Recent Posts
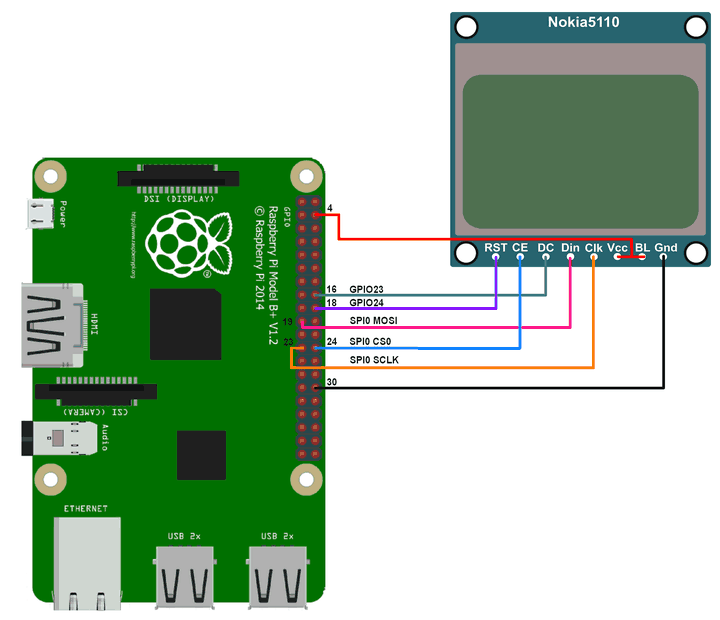
Nokia 5110 LCD with a Raspberry Pi using WiringPi
Nokia 5110 LCD PCD8544 driver with a Raspberry Pi using WiringPi
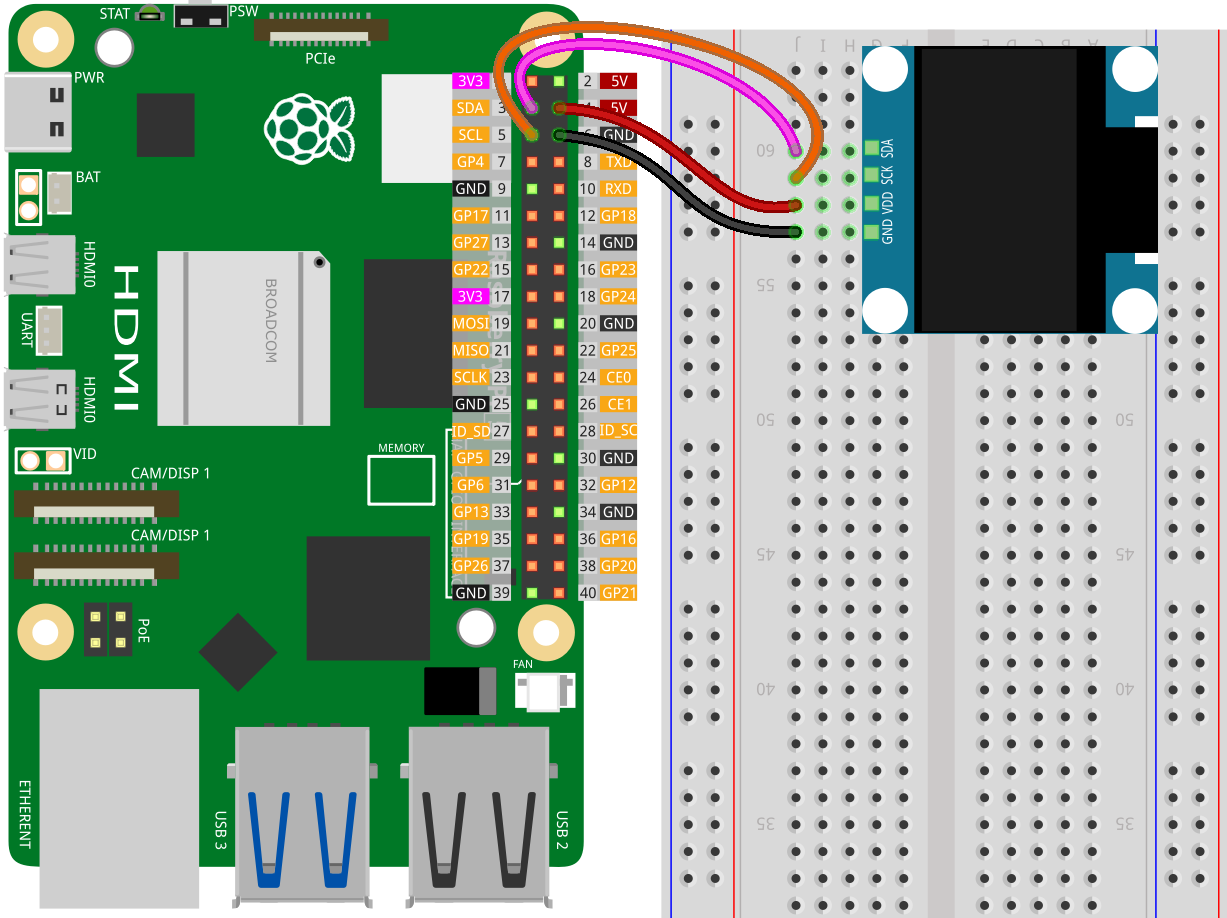
OLED ssd1306 interface with Raspberry Pi using WiringPi
OLED ssd1306 display interface with Raspberry Pi using WiringPi

ESP32 lvgl touch display control multiple relay
To control a 4-channel relay using an ESP32 with a touch display (via LVGL library), you can integrate the relay control with a graphical user interface (GUI).
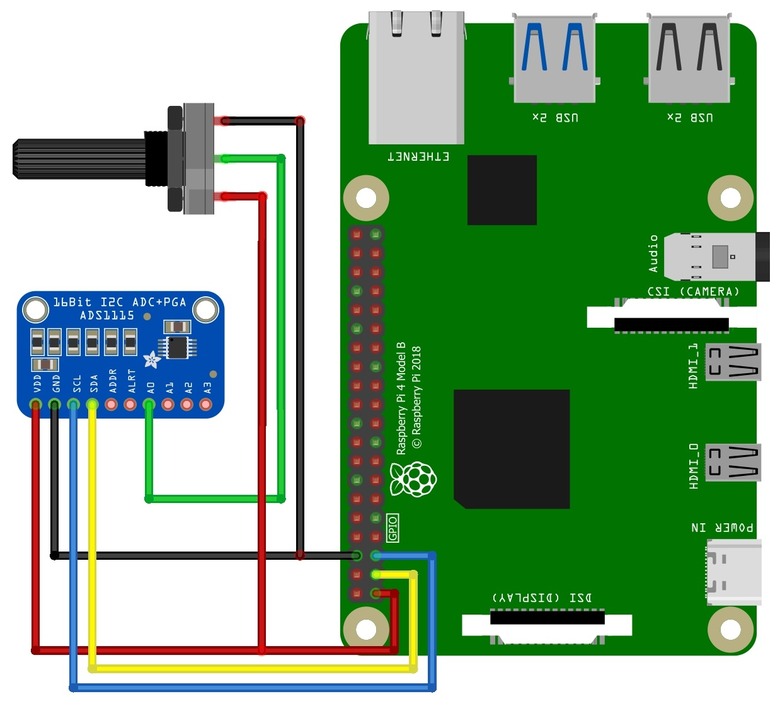
Interface the ADS1115 adc with a Raspberry Pi using WiringPi
Interface the ADS1115 analog-to-digital converter (ADC) with a Raspberry Pi using WiringPi
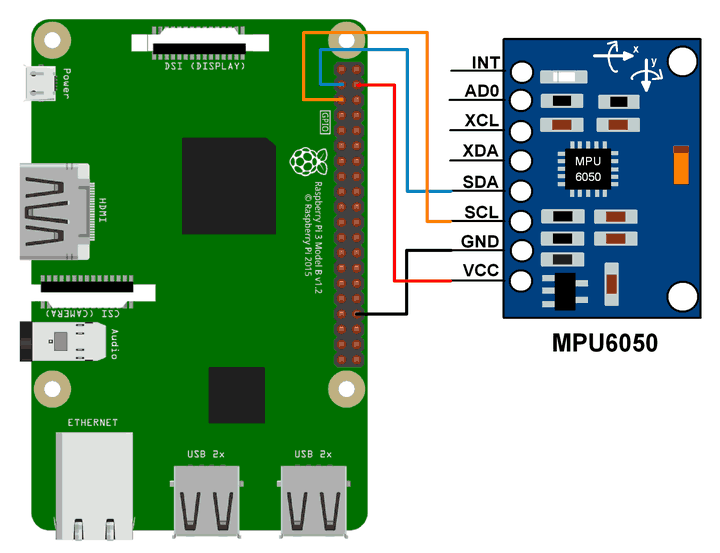
MPU6050 sensor interface with Raspberry Pi using WiringPi
MPU6050 Accelerometer and Gyroscope interface with Raspberry Pi using WiringPi
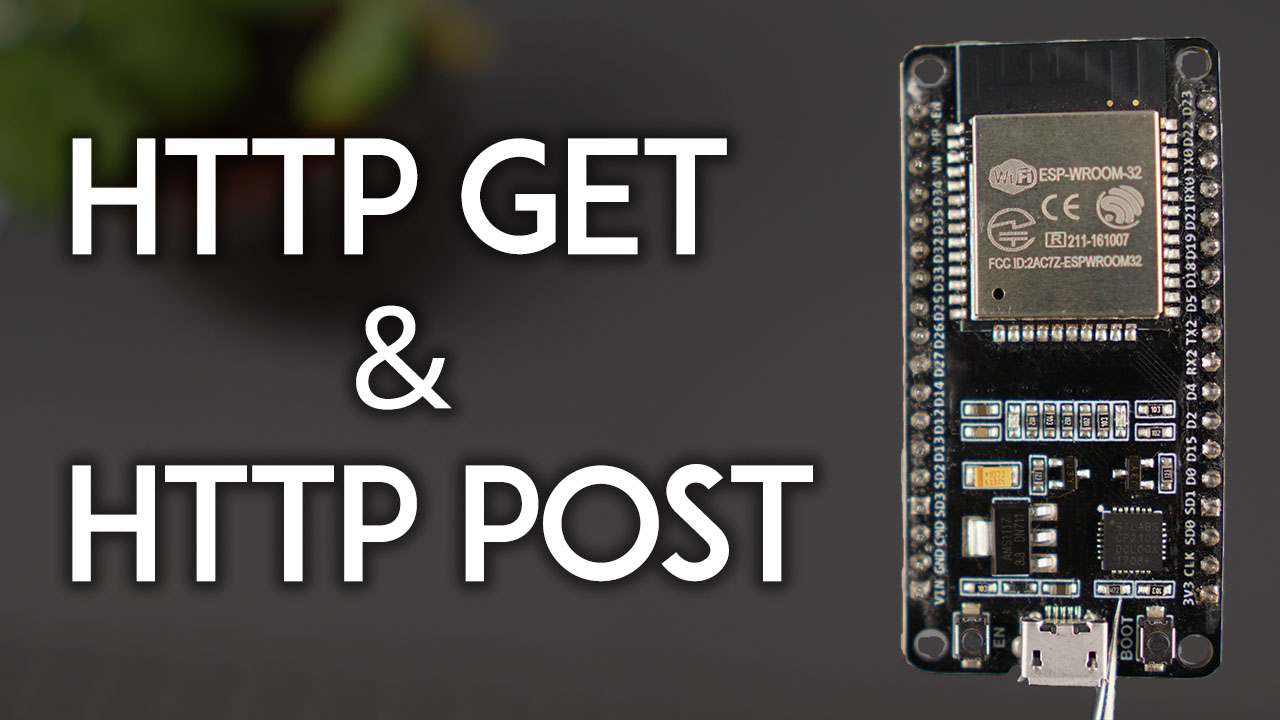
ESP32 Wifi http get and post method request
To perform HTTP GET and HTTP POST requests on an ESP32, you can use the WiFi and HTTPClient libraries.